Showing posts with label projects with my girls. Show all posts

3.30.2013

a springtime project... birds and nests...

the other day when we made salt dough flowers, 

there was a nice size amount of dough left... enough for each of the girls to make a little bird...
{maizie's}
{marina's}

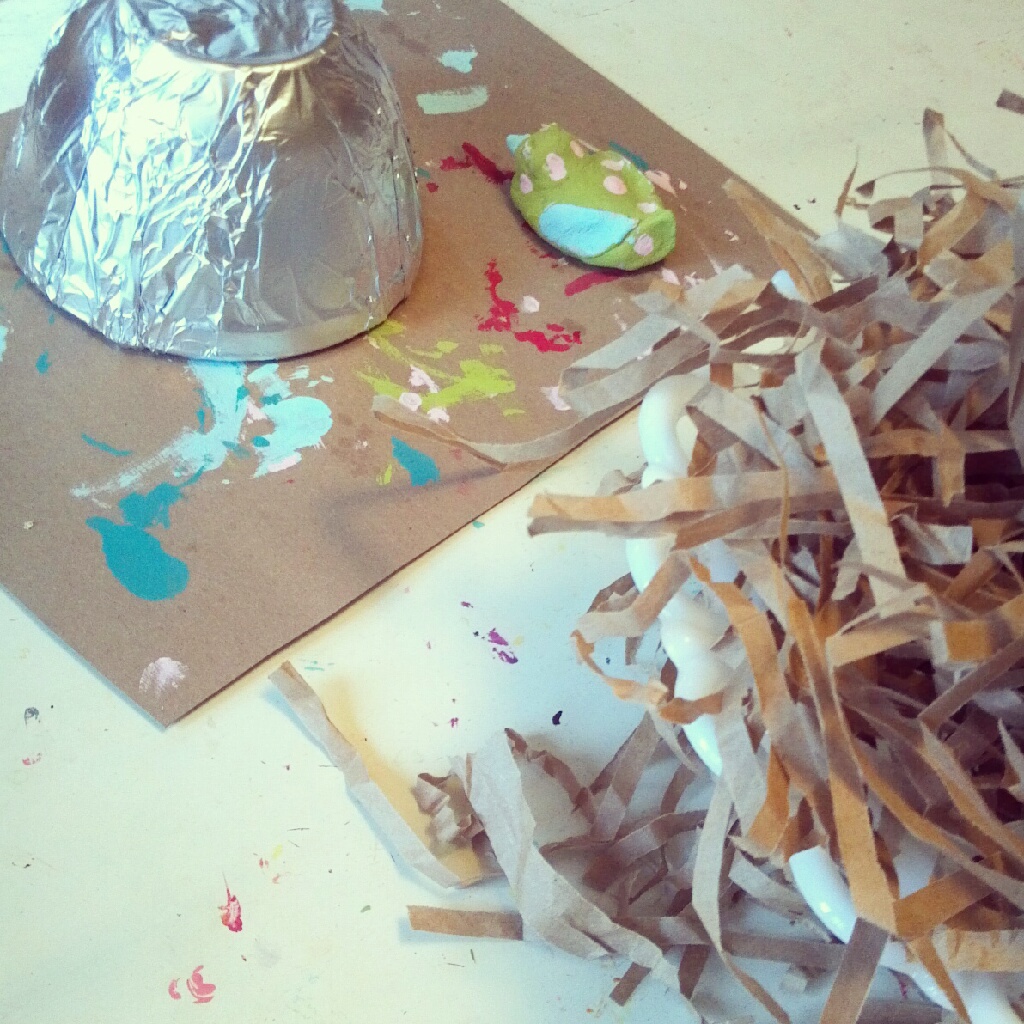
they finally had the chance to paint them today... we went outside to enjoy the weather and they did some painting at the picnic table...

then... i remembered these little nests that i pinned from here quite a while ago... i thought they would make the perfect nest for their birds...


we shredded some paper lunch bags...
covered a bowl with tin foil to use as the basic shape for the nest...
 cut small pieces of the brown bag to use as the base layer...
and used mod podge to attach the paper to our form...
once that part was finished... we took our paper shred and added texture to the outside of the nest...
marina thought it would be cute to add some yarn snippets to the outside as well... 

once they were all dry... we carefully removed the tin foil... added some filler... 

and in went the little bird...
a cute addition to the nests...
the girls had fun with this project... these will be a favorite springtime decoration of mine for years to come!

have a happy day~
angie

linking up with:
afavoritething

3.26.2013

fun with salt dough...

we woke up yesterday morning to MORE snow... 

the amount of snow that we've had in ohio this year hasn't been so bad... however the duration of its stay is getting beyond ridiculous...  i'm really over it... i need some sunshine in my life...

the girls actually had a snow day yesterday... yep... march 25th and a snow day... so... of course, the morning started off with "what are we going to do today?"

there were plenty of things i could have been... and should have been doing but i took some time and made up a batch of salt dough... {i remember making christmas ornaments out of that dough when i was little with my mom and grandma... little trees and candy canes... it was a fun memory...}

we went through our cookie cutters and decided flowers would be cute to make so that's just what we did...

here is the recipe for salt dough that we used:

1 cup of flour
1/2 cup of salt
1/2 cup of water

once the dough was kneaded well, i rolled it out to approximately 1/4" thick...
we then began stamping the flower shapes into the dough...


we used the medium and small flower cutters that we had...

see that straw in the photo above?  we used that to cut out a little hole at the top of each of the flowers... {i forgot to take a photo of that step... oops...}

we lined a baking sheet with tin foil and placed our flower cut-outs on it...

and placed them into the oven which was preheated to 250 degrees...

we let them bake for 2 hours...

once they were out and completely cool... the girls had fun painting them...
they used 2 shades of aqua, green, red, pink and white... {the same colors of the washi tape bunting that i made for across our fireplace...}
{love messes like this... that table has seen many projects... can ya tell?...}
{adding some details...}
{fun colors...}
{the whole bunch...}
{a close-up...}

these were super fun to make... i'm not quite sure what we'll do with them yet... i'm thinking either string them into a garland... or maybe hang them from bakers twine or ribbon from some branches... maybe in the milk bottles on our mantel once our tulips are gone...

have a happy day~
angie


linking up with...

2.02.2013

let's paint...

it's snowy and very cold out here in ohio... so i got out the paints this morning... it was the perfect time to let the girls create...
a sweet friend of mine liked the polka dottie heart art that maizie and her friends made at her birthday party... maizie was excited to make one for her so that's what she worked on today...

let us show you how...
make a heart template and lightly trace the shape onto watercolor paper {even though we are using acrylics, i still like to use watercolor paper because of the texture and thickness of it}...
 select the colors that you want to work with and put a small amount of each onto some paper plates {makes for an easier clean-up}...
 get started filling in the heart with random colored polka dots... using the eraser end of a pencil as your paintbrush...
 keep going and going until your heart is nice and filled in...
{love}
maizie can't wait to get to the post office... this little bit of happy mail will be heading off to someone special very soon :)...


while she was busy with her heart, marina decided to paint a flower... {still working with acrylic on watercolor paper}...
 i love to watch her little hands creating... she concentrates so hard on what she's doing...
 she said... "look mama, do you like the details on my leaves?"... yep, i sure do!...
 {beautiful}

 i decided to work on a little something, too...
i painted a flower first... using the acrylics... and then i did a little series of connected circles...
 
while that was drying i gathered up some of my tie-dyed crepe paper that was left over from the simple valentine garland that i made...  i ruffled it up and sewed it down to a sturdy piece of card stock... then i stitched around and around the center of the flower... finally i used my tiny stamps to spell out "create" in the circles... and i tacked that part down... 
{create}

 i think i'm going to use this as part of the cover for my creative journal that's in the works... a place to store all of the ideas that i have floating around up in this noodle of mine...

it was a fun morning...

so tell me, how did you spend yours?...

have a happy day...
angie

1.09.2013

valentine tree artwork~ a tutorial

i was pulling out our valentine decorations today and i came across the valentine tree artwork that the girls made last year...

i love to do artwork with them... not too many days go by over here where there isn't something being drawn, painted, colored, etc...

it makes them happy and that makes me happy...

last year, i saw this idea for these valentine trees on pinterest... the pin led me to the blog scrumdilly-do! and this post where they made valentine trees... {thanks for the fun idea scrumdilly-do :)}

we decided to do a version of them with some supplies we had on hand...

 ~watercolor paper

~brown acrylic craft paint {slightly watered down}

 ~ shades of red acrylic craft paint

 ~ shades of pink acrylic craft paint

 ~potato {carved into a polka dot stamper... you can also use the small, foam circle brushes from your local craft store... i was fresh out of those so we improvised with the potato :)}

~straw

~piece of paper with a large heart shape cut from the center of it {to be used as a template for the tree top}

how we made them:

step one... take your water color paper and add a small amount of watered down brown acrylic paint to the bottom of the page... take the straw and blow the watered paint up the paper... {it's important to tell the children to only blow on the straw... make sure that they know not to suck in}... move the straw to different areas as the trunk of your valentine tree works its way up the paper... go up the page as far as you'd like with the trunk but make sure you leave room for the heart shaped tree top... {your kids will love how neat the paint spreads and branches out}...

{let your trunks completely dry before moving on to step 2...}

step two...  get your red and pink acrylic craft paint ready...


step three... {this part can be done one of two ways}... you can help your child by holding the open heart shape template over their tree trunk paper or you can tape the template paper and tree trunk papers down... dip the polka dot carved potato stamper {or small, foam circle brush} into the pink and red paints and begin filling in the template... random pink and red polka dots... have them stamp up and down... here and there... until the heart is complete...

the picture above shows marina with our hand made polka dot stamp from a potato... she had a lot of fun with this and thought it was really neat to be using a potato instead of a paintbrush...

step four... lift up the template slowly {help the child with this step} and you'll have something like what's pictured below...


{maizie's finished valentine tree}


{marina's finished valentine tree}

allow them to completely dry...


and be sure to take a cute pic of them proudly holding their paintings...

they really enjoyed making these... and i really enjoyed framing them as valentine artwork to display in the month of february...

have a happy day~
angie


12.30.2012

scenes from around here...

 i think it's fun to have a little glimpse into others lives... so today i'm going to share some scenes from around here with you...
 
 "do-dolph" with your nose so bright...
{marina's hair for her school holiday party}

you know when your child brings you home something from school... that they made with their little hands... and you cry... well, this was one of those times...
{marina...it will forever hold a special place on our hand made tree}
 
my stocking was one of my favorite parts of christmas when i was little... i hope my girls feel the same way...
{the chenille stockings that i made for them}


maizie's favorite thing is art... her oaxacan animal... 
{hummingbird that she made in art class}
 
i've decided that i like cereal more when it's served in a cute bowl...
{love the old pyrex}
 
we've been a little snowed in but it's been good...
 it's given me some down time with the girls...

we've been making snowflakes...
{a fun project to do with kids} 
 
and painting christmas trees...


{maizie did a great job... such a fun, little tree... and i am happy to have a project that fits in this frame that i found at the goodwill store...}

{the snowflakes and the tree were originally seen on meg's blog... she is always a source of inspiration... you can visit her blog here}


some justice shopping for some important things...
{marina cracked me up... she had her little hipster bag packed and ready to go}
 
 a locker to hold your trinkets...
{what every little girl needs ;)... she really liked that it said be happy... and that it had polka dots...}

and some turquoise fuzzy slippers
{maizie has wanted these forever... thanks for the gift card aunt sherry and uncle bobby!} 
 
we've had olive garden for lunch thanks to a gift certificate from grandma reese
 
that included these yummy desserts...
{the one one the left was the best... chocolate and caramel...yum} 
 
we spent time with great friends at their holiday party... live music and laughs... so much fun that the girls slept in until 11:00 and john until 11:45... i don't know how i didn't get any pictures of the festivities but there was drum playing by maizie and she was thrilled... thanks david for giving her a lesson...
 
last night my friend jen and her family were in from florida and they came over to visit... it was so nice to watch the kids play... hide and seek, apples to apples, wipe out on the wii...
and catching up with jen is always a good time... lots of laughs with that girl...

we had antone's pasta and salad for dinner... and i made a couple of appetizers... buffalo chicken dip with chips...and mini bacon and tomato cups... the mini bacon and tomato cups seem to be a favorite... i think i'll share that recipe with you tomorrow...
 
have a happy day~
angie